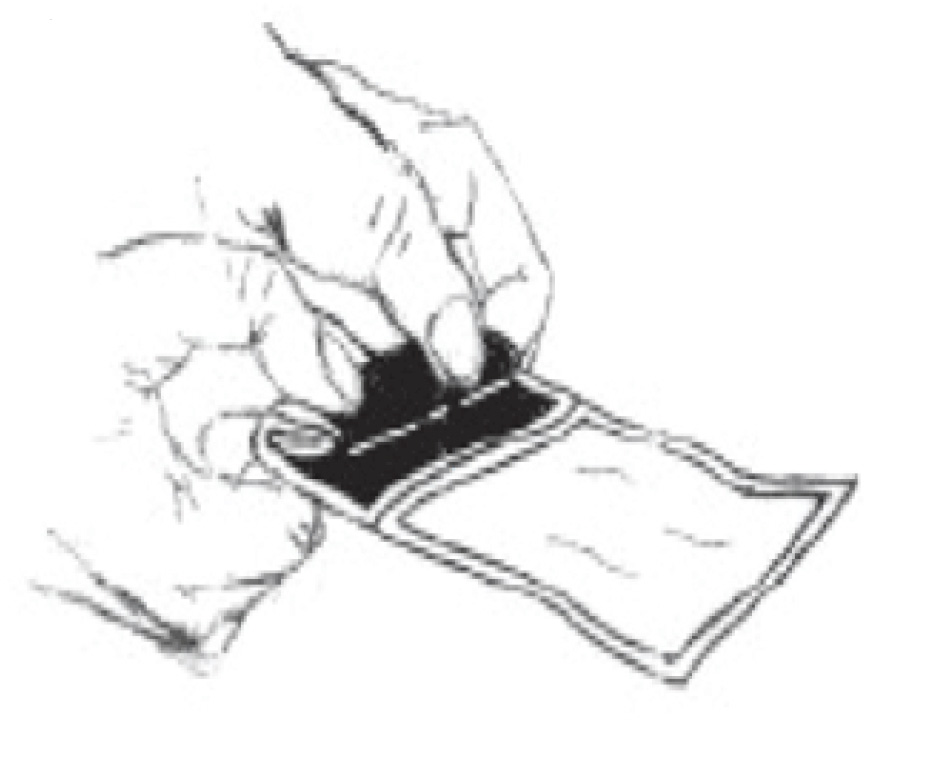
Best Practice tips and techniques for epoxy burst pouch / burstable seal bi-packs. You may want to save these tips – and refer to them when training your cable assembly production team.
Here are instructions for burst pouch bi-packs (with notes for best results)
Step 1: Roll the pouch toward the burst seal.

Step 2: Use your thumbs to apply pressure and rupture the burst seal.

Step 3: Use a table edge to mix the resin and hardener (Part A and Part B).
I recommend counting 25 passes to achieve a uniform color and mixture. In each pass, methodically push all the material to one end of the package, then to the other end. Check the corners of the bi-pack to ensure all the material is mixed in. Counting the number of passes (instead of minutes) helps to ensure a uniform mixture, without overmixing.
Also, be sure to note the time. The epoxy’s pot life and work life begin the instant it’s mixed. Some epoxies have a pot life of 2 hours, some are 24 hours, so be sure to read the datasheet. It’s extremely helpful to set up an efficient, streamlined production process, which can minimize epoxy waste.

Step 4: Cut the corner of the package and squeeze the mixed epoxy into a dispensing syringe.
Once in the syringe, it must be degassed. To remove trapped air, you can use a vacuum de-airing process or centrifuge, depending on what works best for your process and application.

READ THE BLOG: Epoxy Bi-Pack News – and Usage Tips for Best Results
Additional resources from the FOC team include:
- Category Resource
- View the Glossary, Acronyms, Military Specifications for Connectors
- Q&A Resource: email technical questions to AskFOC@focenter.com
Have questions about this FOC Tip?
Contact FOC with questions at: (800) 473-4237 / 508-992-6464 or email: FiberOpticCenter@focenter.com and we will respond ASAP.
This article is an original publication of Fiber Optic Center, Inc. It is shared publicly for educational and reference purposes to support learning and professional development within the fiber optics industry.
You are welcome to read, cite, or reference this material for non-commercial and educational purposes, as long as full credit is given to Fiber Optic Center, Inc. and the author.
Reuse, reproduction, or adaptation of this content — including rewriting, republishing, or incorporating it into new materials (such as websites, blogs, marketing text, technical guides, or AI-generated content) — is not permitted without prior written consent from Fiber Optic Center, Inc.
This material is protected by copyright law upon publication, even if not formally registered.
Use of this content for AI training, automated data extraction, or derivative content generation is prohibited.
Fiber Optic Center monitors and enforces the integrity of its intellectual property through digital identifiers and content tracking.
For more details, please refer to the Fiber Optic Center Content Use and Copyright policy.


