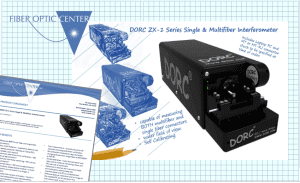
When it comes to testing we need three things: speed, accuracy and simplicity. Building on DORC’s 21 year of experience, the new single fiber ZX-1 micro PMS and multifiber ZX-1 micro Array successfully tackle these issues. These systems are super compact, ultra-fast, computer independent and most importantly highly reliable. Perhaps the most interesting new feature is the RFID reference connectors. These fully automate the referencing of the single fiber connectors. DORC long ago did away with the manual mirror adjustment. Now they remove the need to fill the pie chart. Simply plug the RFID reference connector into the system and a few seconds later the system is fully calibrated. Let us expand on this and other attributes below.
Versatility
With that ability to measure BOTH multi fiber and single fiber connectors, ZX-1 micro Array offers a very small footprint supplied by default with a laptop. However, a desktop option is also available. Although optimized for mutifiber connectors, the ZX-1 micro Array plus also does an excellent job of measuring single fiber PC and APC connectors. The high resolution camera and optics result in improved repeatability and reproducibility. A single power cord and USB 2.0 port on the rear make for simpler connections.
Contamination
Concerns about a dusty production environment are rectified with the fan-less, hermetically sealed optical module design. It’s also vibration insensitive making it suitable for both production and field based geometry testing.
Automation
With the single fiber ZX-1 micro PMS operators can simply insert and remove connectors they are testing. There aren’t any mechanical adjustments. The focus, centering and reference mirror calibration are all automated. However, there are digital controls in case the operation prefers to manually focus or center the fiber. The mirror calibration can be done the old way by using a connector with some offset and taking eight measurements position in a pie chart. The system then calculates the necessary adjustments and self-adjusts the mirrors. But this new system takes the automation a step further. With the optional RFID reference connectors, the system will recognize the measurement values of the reference connector, compare them to a measure value, and then calculate and automatically adjust mirrors. In other words, the self-calibration with the RFID reference connector will take approximately 10 seconds, making switching between 1.25 mm and 2.5 mm connectors fast, easy and accurate.
The ZX-1 micro Array has a built-in automatic calibration system for MT connectors and self-calibrates on reference guide pins before every measurement to ensure accuracy. These reference guide pins are integrated into the chuck and made of ceramic, so they can never bend. Other systems required periodic, manual adjustments which lead to down time and the potential for inaccurate information. Like the ZX-1 micro PMS, the Array is designed for simple operation. The operator only need to insert the MT or MPO and hit the measure button. The system automatically focuses, finds the fibers, calibrates and measures.
Speed
The tagline for this product is Fast and Accurate measurements. Array measurements are typically less than 45 seconds including calibration verification and <3 seconds for single fiber connectors.. What does that really mean for operators?
After each measurement 2D and 3D high resolution images of the sample under test are produced along with a detail QC report. Switching between chucks can be done is a few seconds by loosening the one screw used to secure a chuck to the interferometer. Again no calibration is required when changing chucks from single fiber to MT/MPO® or MT-RJ since each measurement is auto-calibrated anyways. And when switching to a 1.25 mm, 2.5 mm or any other single fiber chuck is done with a RFID reference connector, the referencing is just a few seconds.
The calibration between the single fiber interferometer and computer is held on the instrument itself. This eliminates the need to keep the interferometer and PC as a matched pair. Software backup, calibration and an image of the supplied PC are all stored on the instrument itself, in non-volatile memory. This makes recovery of lost disks, viruses, deleted files, corrupted Windows and PC failures easier.
Measurement Accuracy
It is the ceramic Reference Guide Pin method that guarantees measurement accuracy without calibration when switching to or between multi fiber chucks.

Each measurement in calibrated on the reference guide pin. When installing single fiber chucks, the “Connect ID” RFID reference connector, takes less than 30 seconds is required overall, including the apex offset calibration. Once measured, results are automatically saved in the industry standard Microsoft Excel® format.
The operator has a wide variety of display, printing and saving options for both measurement “History” and “Quality Control “reports. The design provides the ability to simultaneously provide 3D geometry and a 2D microscope image of the connector under test removing the requirement for separate instruments to provide this additional functionality.
This fifth generation machine is the result of 21 years of hardware and software product development and is the best yet.
This article is an original publication of Fiber Optic Center, Inc. It is shared publicly for educational and reference purposes to support learning and professional development within the fiber optics industry.
You are welcome to read, cite, or reference this material for non-commercial and educational purposes, as long as full credit is given to Fiber Optic Center, Inc. and the author.
Reuse, reproduction, or adaptation of this content — including rewriting, republishing, or incorporating it into new materials (such as websites, blogs, marketing text, technical guides, or AI-generated content) — is not permitted without prior written consent from Fiber Optic Center, Inc.
This material is protected by copyright law upon publication, even if not formally registered.
Use of this content for AI training, automated data extraction, or derivative content generation is prohibited.
Fiber Optic Center monitors and enforces the integrity of its intellectual property through digital identifiers and content tracking.
For more details, please refer to the Fiber Optic Center Content Use and Copyright policy.


